一、前言
Cacti是一套基于PHP、MySQL、SNMP及RRDTool开发的网络流量监测图形分析工具。
作为网络工程师,我主要用它来监控端口流量以及计算流量的95值。
这篇笔记我就把我找到的一种最简单的安装cacti的方法分享出来。
二、Cacti工作流程
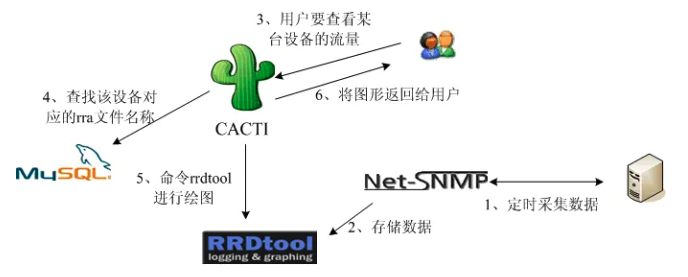
Cacti的工作流程:
步骤一,snmp协议收集远程服务器的数据
步骤二,将snmp收集的数据内容保存到rrd数据库中
步骤三,若用户查看某台设备上的流量或其它状态信息
步骤四,在mysql数据库中查找该设备对应的rra数据库文件的名称
步骤五,通过rrdtool命令进行绘图即可
三、关键组件
Poller: 数据采集核心,负责与设备通信。
RRDtool: 处理数据存储和图表生成。
Web 界面: 用户交互入口,基于 PHP 和 MySQL。
MySQL 数据库: 存储 Cacti 的配置信息(如设备列表、模板)。
Cron: 定时触发采集任务。
四、安装
关于安装网络上的教程大部分都是一个组件一个组件安装,然后配置配置文件参数。相对来说比较麻烦。
我发现很多linxu发行版,都有对安装cacti的支持。比如debian,opensuse等,这篇文件我主要通过opensuse的官方包管理器来安装并配置cacti.
opensuse包管理器安装(详细过程)
4.1、安装系统及换源
#安装opensuse系统并换源
#禁用官方软件源
zypper mr -da

#添加镜像源
zypper ar -cfg 'https://mirrors.tuna.tsinghua.edu.cn/opensuse/distribution/leap/$releasever/repo/oss/' mirror-oss
zypper ar -cfg 'https://mirrors.tuna.tsinghua.edu.cn/opensuse/distribution/leap/$releasever/repo/non-oss/' mirror-non-oss
zypper ar -cfg 'https://mirrors.tuna.tsinghua.edu.cn/opensuse/update/leap/$releasever/oss/' mirror-update
zypper ar -cfg 'https://mirrors.tuna.tsinghua.edu.cn/opensuse/update/leap/$releasever/non-oss/' mirror-update-non-oss

#更新源
zypper update
4.2、配置NTP校准时间及时区
时间及时区对cacti稳定运行很重要!
opensuse系统安装时会让选择时区,并且系统也会默认安装NTP软件。
# 查看NTP软件是否开启
systemctl status chronyd
# 查看时区是否正确
timedatectl
4.3、安装cacti
4.3.1、安装软件 mysql、cacti、cacti-spine
值得说的是这三句命令即把cacti需要的组件已经安装完毕(包括LAMP环境的PHP,apache2以及cacti的相关组件snmp,RRDTool),相比我们单独安装每一个组件而言非常简单。只需要运行这三句代码即可。
# 安装 mysql、cacti、cacti-spine
zypper install mysql
zypper install cacti
zypper install cacti-spine


# 启动软件并加入开机自启
systemctl enable mysql.service --now
systemctl enable snmpd.service --now
4.3.2、启用 apache2 的 cacti.conf 配置文件。
#通过/etc/sysconfig/apache2 中将字符串 CACTI 添加到 APACHE_SERVER_FLAGS 来完成的。

vim /etc/sysconfig/apache2
# 修改对应的条目为
APACHE_SERVER_FLAGS="CACTI"

# 启动软件并加入开机自启
systemctl enable apache2.service --now
4.3.3、修改apache2的配置文件
# 修改apache2对应cacti目录的访问权限
# 给Cacti目录权限
chown -R wwwrun:www /srv/www/cacti/
# 允许apache2允许访问相关目录的权限
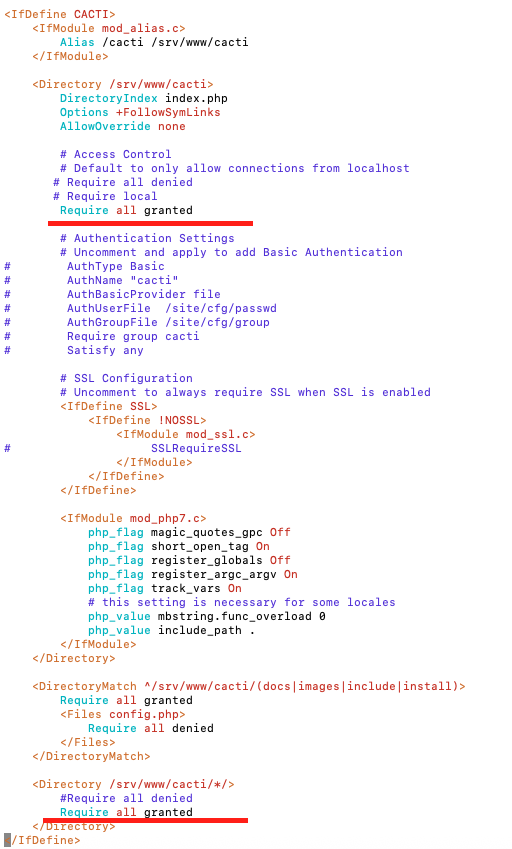
vim /etc/apache2/conf.d/cacti.conf
# 修改见下图将两处的不允许改为Require all granted
4.3.4、配置数据库
首先,创建数据库及数据库用户
# 用户密码请自己修改
mysql -p
mysql> create database cacti;
mysql> GRANT ALL ON cacti.* TO cactiuser@localhost IDENTIFIED BY 'cactipasswd';
mysql> grant select on mysql.time_zone_name to 'cactiuser'@'localhost' identified by 'cactipasswd';
然后,配置cacti与数据库连接,及导入数据库
# 注意账户密码与创建的数据对应一致
vim /srv/www/cacti/include/config.php

# 填写数据库信息
$database_type = "mysql";
$database_default = "cacti";
$database_hostname = "localhost";
$database_username = "cactiuser";
$database_password = "cactipasswd";
$database_port = "3306";


# 导入数据库
mysql -u root -p -b cacti < /srv/www/cacti/cacti.sql
4.3.5、防火墙放行端口
# 这里把apache2的监听端口改为了20080,如果你用80端口这里不用修改
vim /etc/apache2/listen.conf

# 防火墙放心20080端口,如果不修改就放行80端口
firewall-cmd --permanent --add-port=20080/tcp
firewall-cmd --reload
4.3.6、浏览器打开cacti安装流程
将SERVER更改为你的域名或者IP
4.3.7、浏览根据cacti流程安装
注意!!! cacti的安装流程将对环境进行一次详细的检测,检测通过后安装基本不会有什么问题
首先,会提示你没有安装的php插件,这里根据提示安装所需的插件就好。
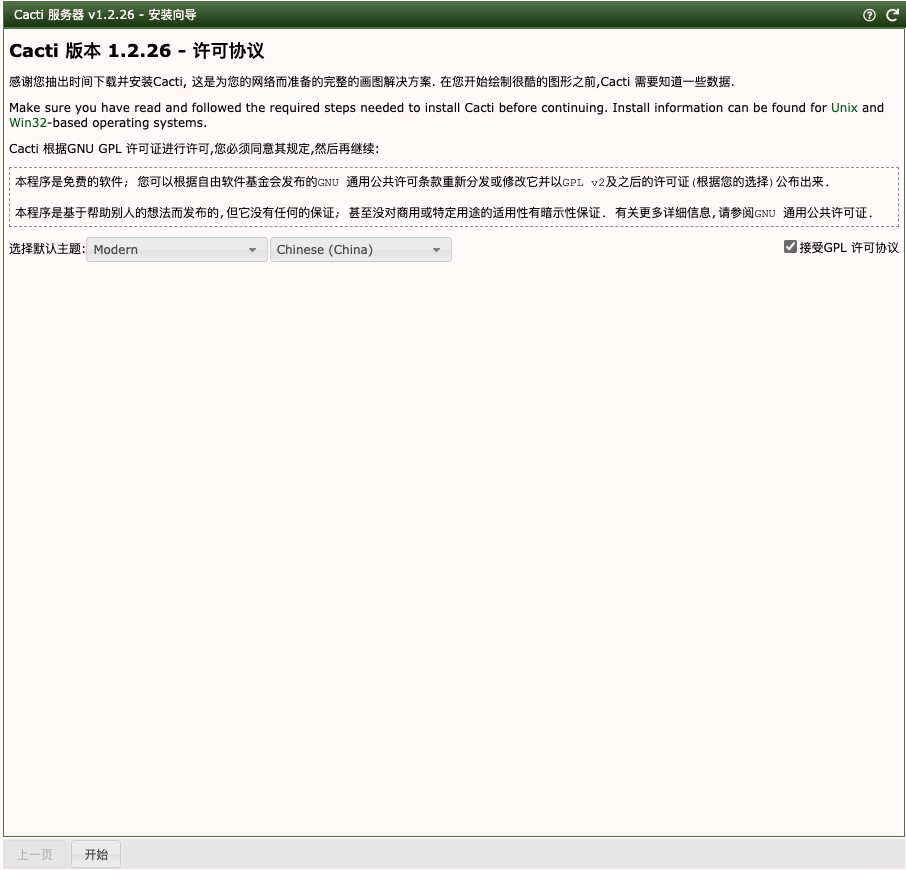
7.1、打开安装网页后输入账户密码admin 然后输入新的密码,接受许可协议。点击 开始。
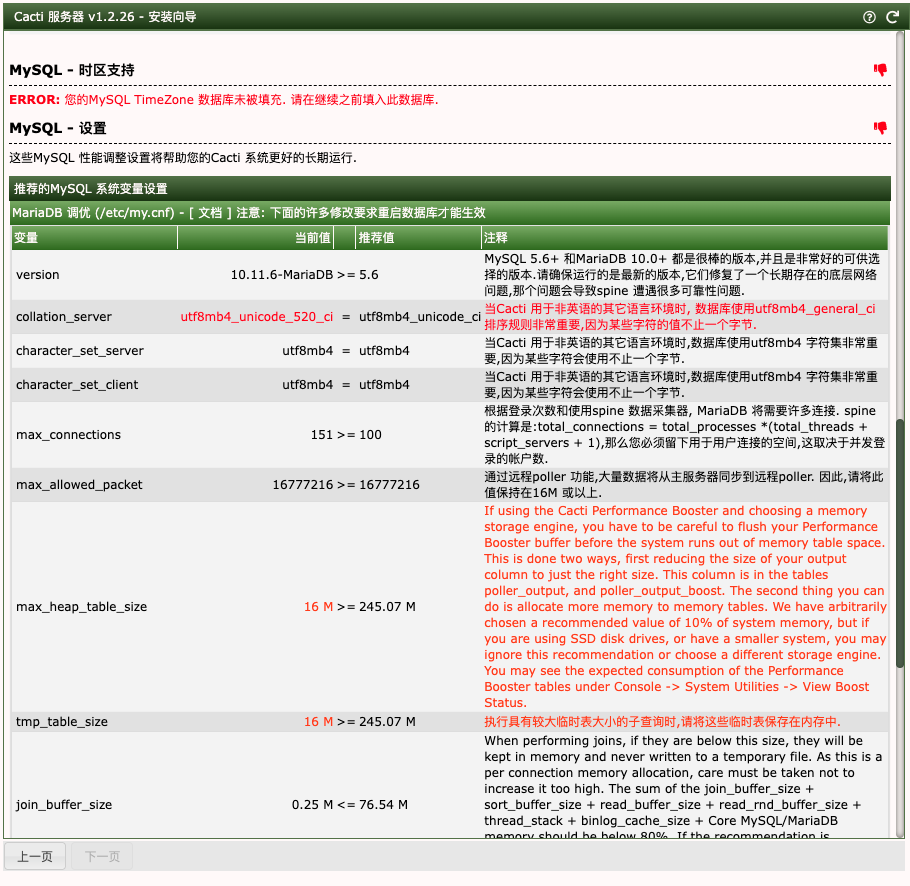
7.2、预安装检查。注意!! 这里非常重要,要实际根据提示修改对应的配置文件
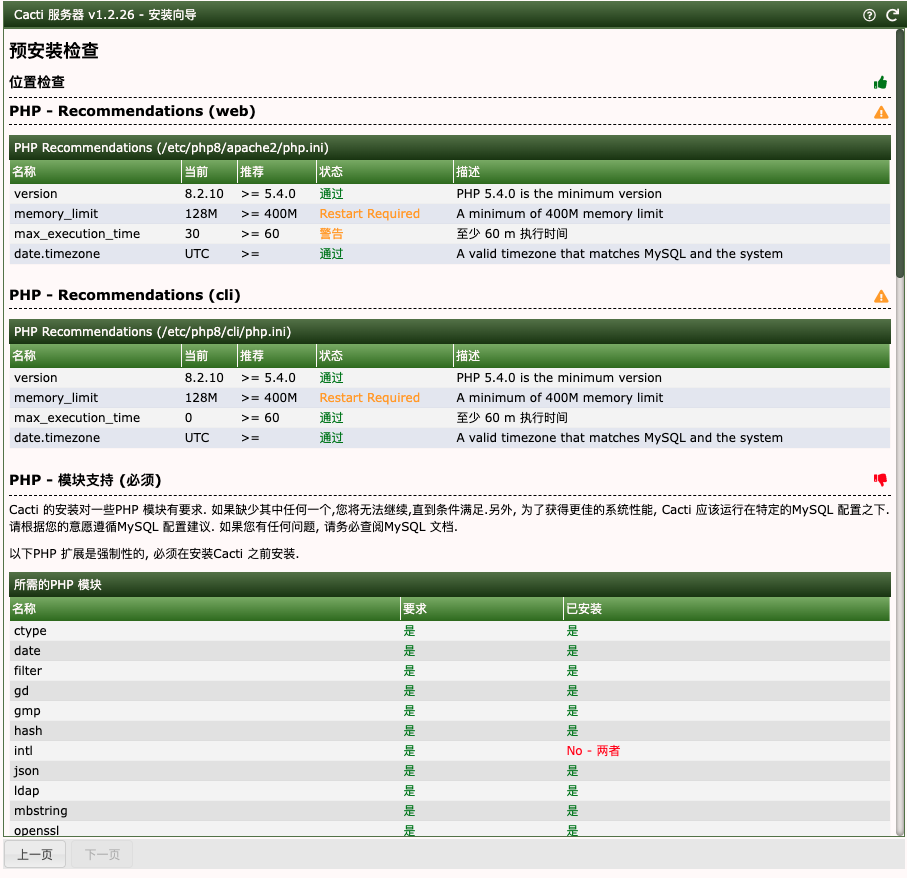
# php 目录    注意! 时区一定要修改为当地的时区,修改满足检测即可
vim /etc/php8/apache2/php.ini

vim /etc/php8/cli/php.ini

date.timezone = Asia/Shanghai
# 这两个文件都改时区. 等


# 安装缺失的PHP模块
# 根据提示安装所需要的PHP插件,也可以不用查看php版本。直接安装就自动匹配版本zypper install php-intl
php -v 查看版本
zypper install php8-intl
zypper install php8-pcntl
zypper install php8-gettext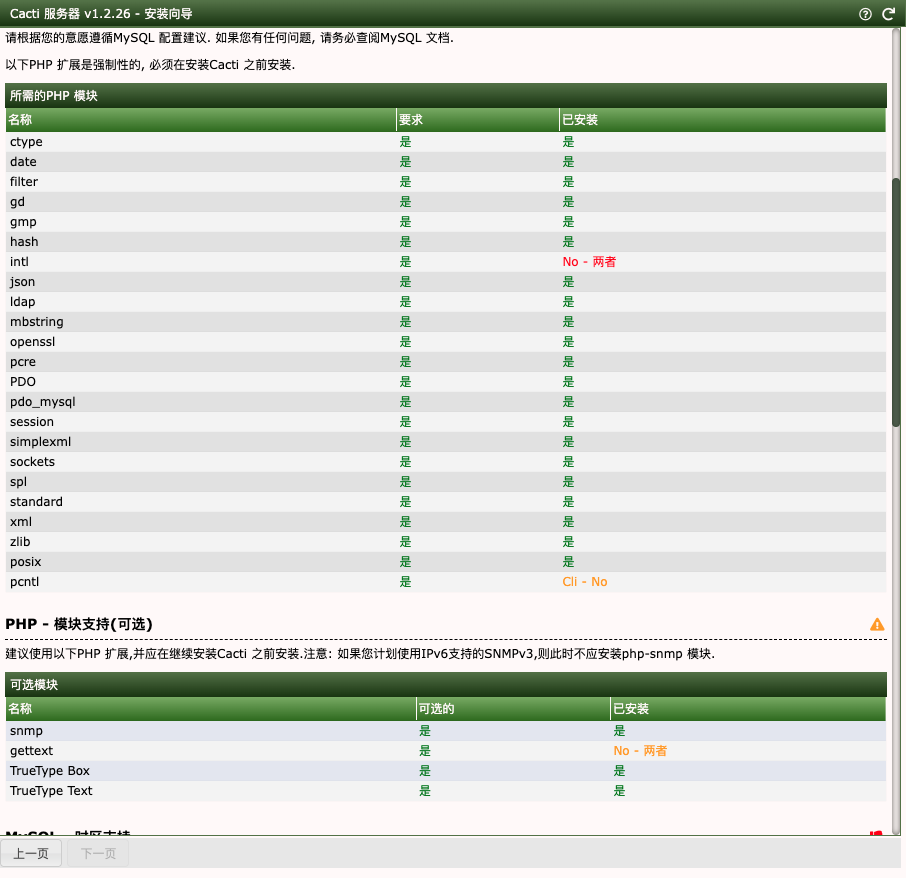
# 安装mariadb-tools填充数据库SQL TimeZone

zypper install mariadb-tools
mysql_tzinfo_to_sql /usr/share/zoneinfo/ | mysql -u root -p mysql


# 因为 /etc/my.cnf 里写了/etc/my.cnf.d/*。下边的目录都可以
# 所以在这个目录下边新建配置文件 对Mysql进行调优

 vim /etc/my.cnf.d/server.cnf

[mysqld]
collation_server = utf8mb4_unicode_ci
max_connections = 151
max_allowed_packet = 16777216
max_heap_table_size = 1G
tmp_table_size = 1G
join_buffer_size = 16M
sort_buffer_size = 8M
innodb_file_per_table = ON
innodb_buffer_pool_size = 8192M
innodb_doublewrite = OFF
innodb_lock_wait_timeout = 50
innodb_flush_method = O_DIRECT
innodb_use_atomic_writes = ON
# 每次修改或者全部修改完毕,要重启服务,
systemctl restart httpd
systemctl restart mysql
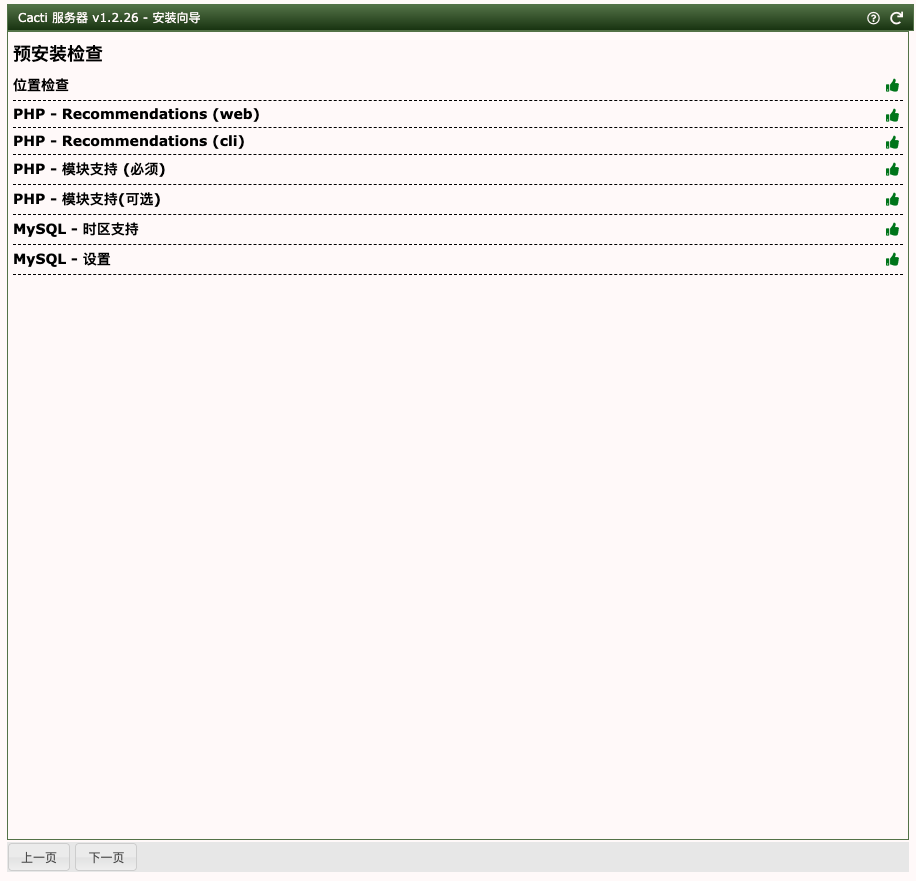
7.3、刷新网页。全部检测通过后点击 下一页 ,如遇到告警或错误要满足条件默认点击下一步
# 修改数据库的告警
mysql -uroot -p

ALTER DATABASE cacti CHARACTER SET utf8mb4 COLLATE utf8mb4_unicode_ci;

# 另一个告警是转换数据库表格直接点击下一步转换就好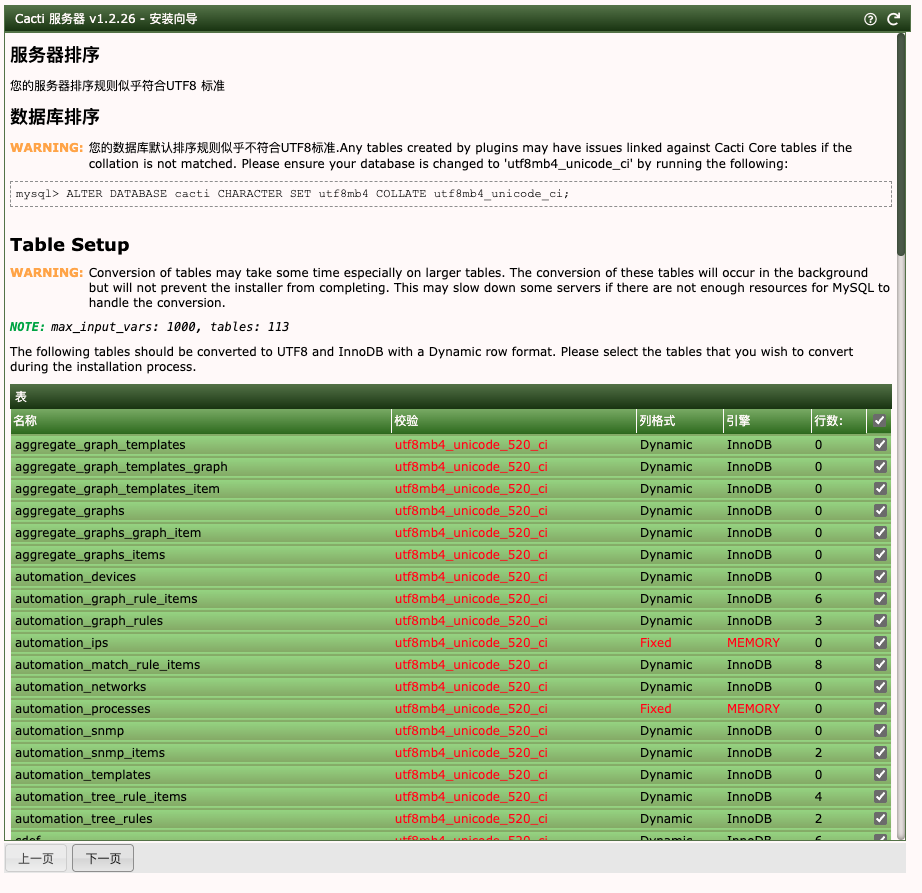
勾选确认安装,直至安装完成即可!
4.4、安装及配置cacti-spine
4.4.1、配置cacti-spine,其实这个软件包我们已经安装过,这里主要是进行配置。
# 安装cacti-spine
# 已经安装完毕要配置
zypper install cacti-spine
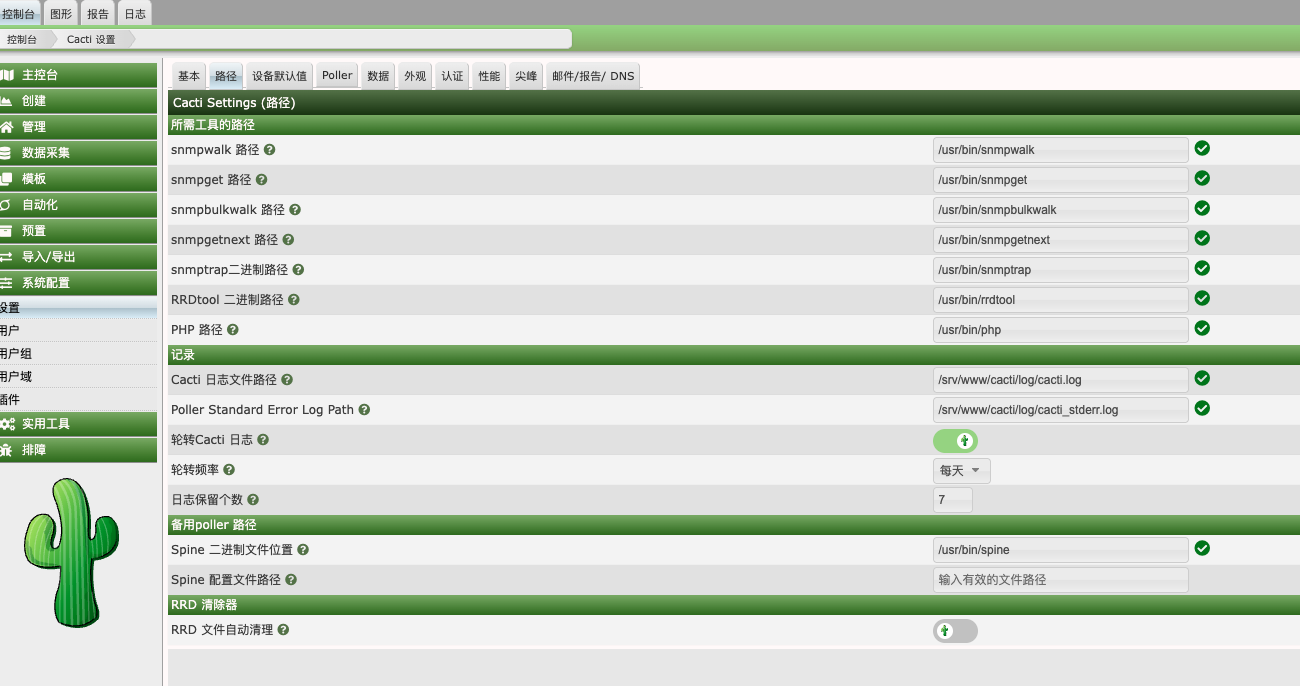
# 第一步 网页里 控制台-设置-路径
# 填写spine配置文件路径:
/etc/spine.conf
# 第二步 Poller Standard Error Log Path 这个文件由于没有创建要touch创建一下
touch /srv/www/cacti/log/cacti_stderr.log
# 第三步 复制etc目录里 cacti-spine的配置文件模版。 然后修改配置文件,填写数据库信息
root@localhost /etc# cp /etc/spine.conf.dist /etc/spine.conf
root@localhost /etc# vim /etc/spine.conf
# 例子
DB_Host localhost
DB_Database cacti
DB_User cactiuser
DB_Pass cactipasswd
DB_Port 3306
# 第四步 测试spine.
/usr/bin/spine
# 回显这个正常
SPINE: Using spine config file [spine.conf]
Version 1.2.27 starting
Time: 0.5139 s, Threads: 1, Devices: 1
# 第五步 crontab 定时任务调用poller
crontab -e
*/5 * * * * /usr/bin/php /srv/www/cacti/poller.php > /dev/null 2>&1
# 启动并开启自启crontab
systemctl enable cron --now控制台-设置-路径 路径全部绿色对勾
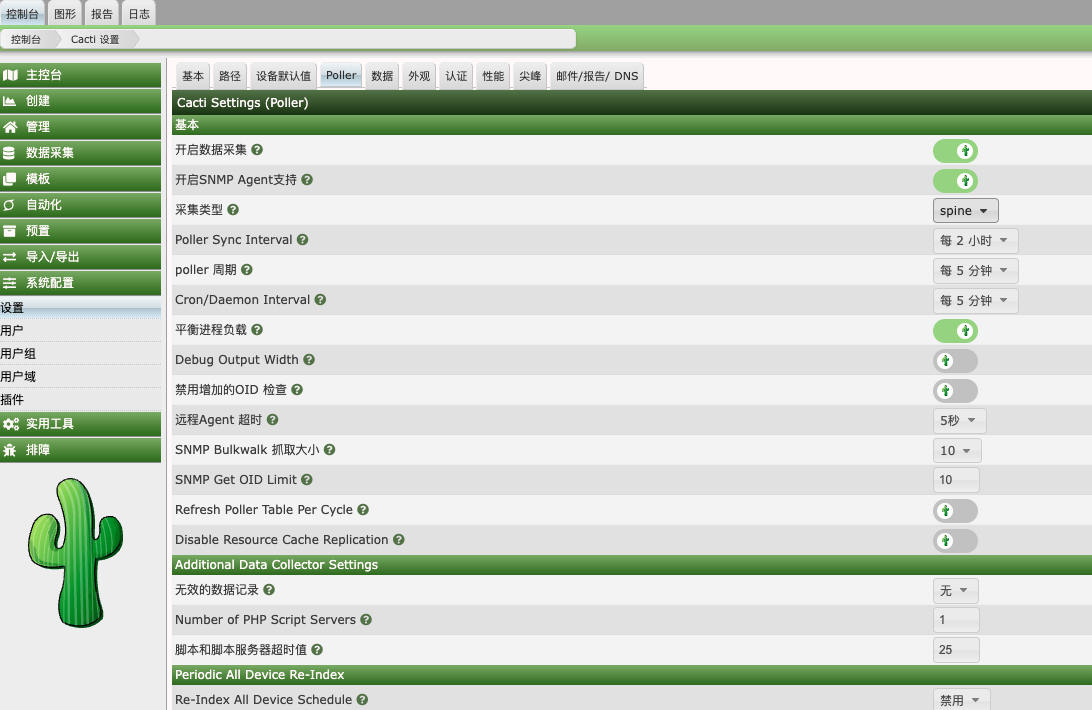
控制台-设置-Poller 采集类型选择spine
4.5、Cacti图形乱码
解决cacti的图形显示中文乱码,安装中文字体即可
# 安装字体
# 安装 WenQuanYi 字体(开源中文字体,适合 Cacti):
zypper install wqy-zenhei-fonts wqy-microhei-fonts
# 安装字体
zypper install noto-sans-cjk-fonts
# 查看安装的字体
fc-list | grep -i "wenquanyi\|noto"


# 刷新字体缓存:
sudo fc-cache -fv
五、配置完毕后,安装全部完成!
5.1、注意事项
默认包管理安装时候,要确定好安装的源是不是稳定源,确定好cacti的版本。安装mirror-oss的版本。否则可能安装的是调试版本。
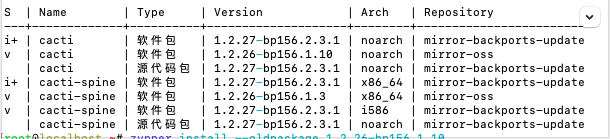
# 查看包管理器的cacti版本
zypper search cacti  --details
5.2、安装后的安全措施
当我安装完毕后发现再次打开/cacti/install 发现安装流程还能打开,所以我需要把/install目录禁止访问
# 修改对应的apache2配置文件,禁止访问install目录
vim /etc/apache2/conf.d/cacti.conf

#
<DirectoryMatch ^/srv/www/cacti/(docs|images|include)>
    Require all granted
    <Files config.php>
       Require all denied
    </Files>
</DirectoryMatch>
<DirectoryMatch ^/srv/www/cacti/install>
    Require all denied
</DirectoryMatch>

#

# 重启apache2服务
systemctl restart httpd
5.3、Cacti的其他笔记
5.4、Debian包管理器安装Cacti的参考资料
debian同样支持包管理器安装,详细文档请查看上方链接。及参考opensuce的相关配置文件进行安装即可。
#Cacti
#Initial install:

# Make sure the stack is installed and running first

apt install apache2 libapache2-mod-php mariadb-server postfix
a2dismod mpm_event
a2enmod mpm_prefork
service apache2 restart
# Install and auto-configure Cacti
apt install cacti

# Visit http://localhost/cacti/ and login (admin:cacti).

#Cacti on bullseye appears to suffer from installation issues due to forcing going through install.php (or, I did something #wrong during the package installation). You may also need to complete this for exploits that make use of the installation #pages:

#In case of infinite redirects, go to /cacti/auth_changepassword.php and change the initial password (admin:admin), #respecting the password constraints (e.g. Admin123!)

#MySQL TimeZone can be populated through mysql_tzinfo_to_sql /usr/share/zoneinfo/|mysql mysql

#Cacti-Install insists on setting date.timezone, e.g. date.timezone = "Europe/Paris" in /etc/php/x.x/{apache2,cli}/php.ini

#Cacti-Install insists on getting write access to /usr/share/cacti/site/{resource,site}/, you can chown -R root:root back #after the install

#Fix cron errors: chown www-data: /var/log/cacti/poller-error.log

#To create a simple SNMP-monitorable devices on localhost:

apt install snmpd

# optional: to use SNMP human-readable identifiers,
# we need MIBs under the RFC (sadly non-free) license:
apt install snmp-mibs-downloader  # + see README.Debian

# to easily unlock more local graphs, strip down rights management:
echo 'rocommunity public' > /etc/snmp/snmpd.conf  # one-liner conf
service snmpd restart

snmpget -v2c -c public localhost .1.3.6.1.2.1.1.3.0  # sysUpTime.0
#You can then add a new Net-SNMP device for 127.0.0.1 in the web interface.

#Cacti has a LOT of features, the more advanced of which aren’t properly handled in the web interface (such as additional #pollers requiring manually inserting entries in the database). I’d suggest making targetted testing for each feature you #patched.

#Plugins: Cacti supports external plugins. There’s a list of current plugins. You can try to install the simple Thold one.

#Copyright (C) 2025 Sylvain Beucler